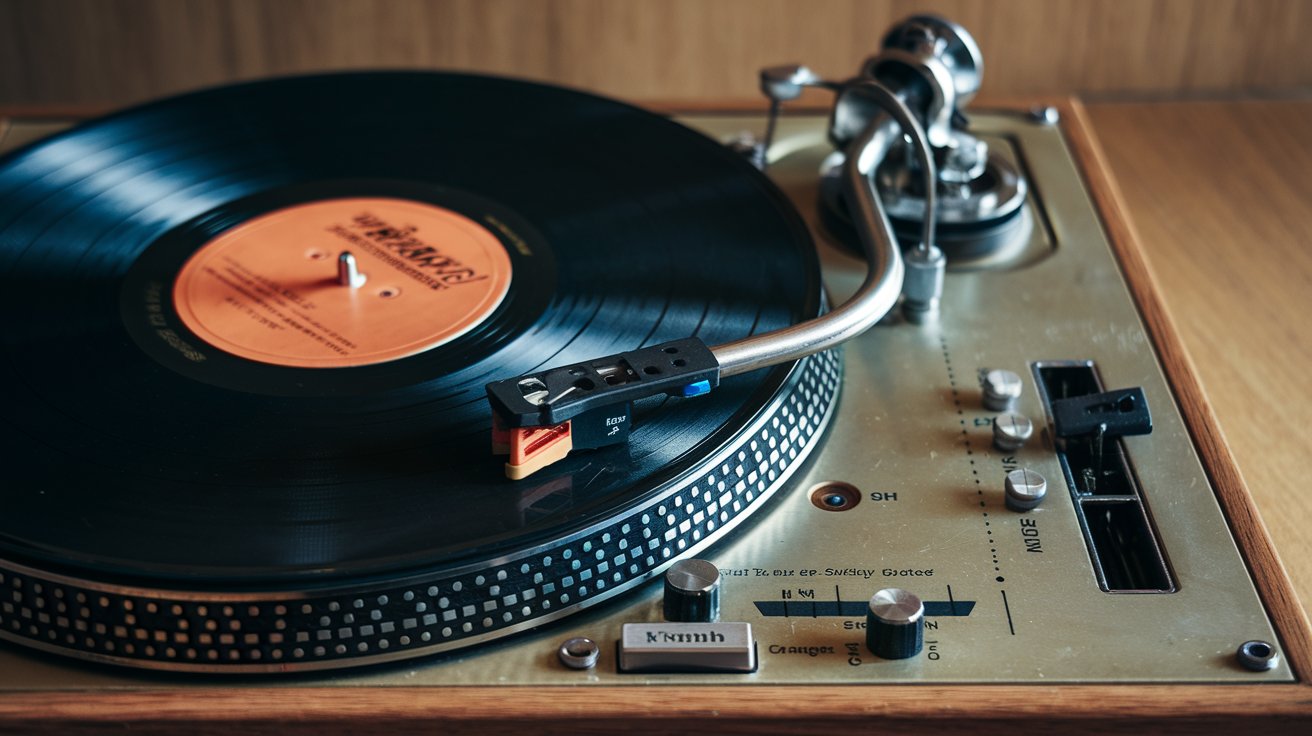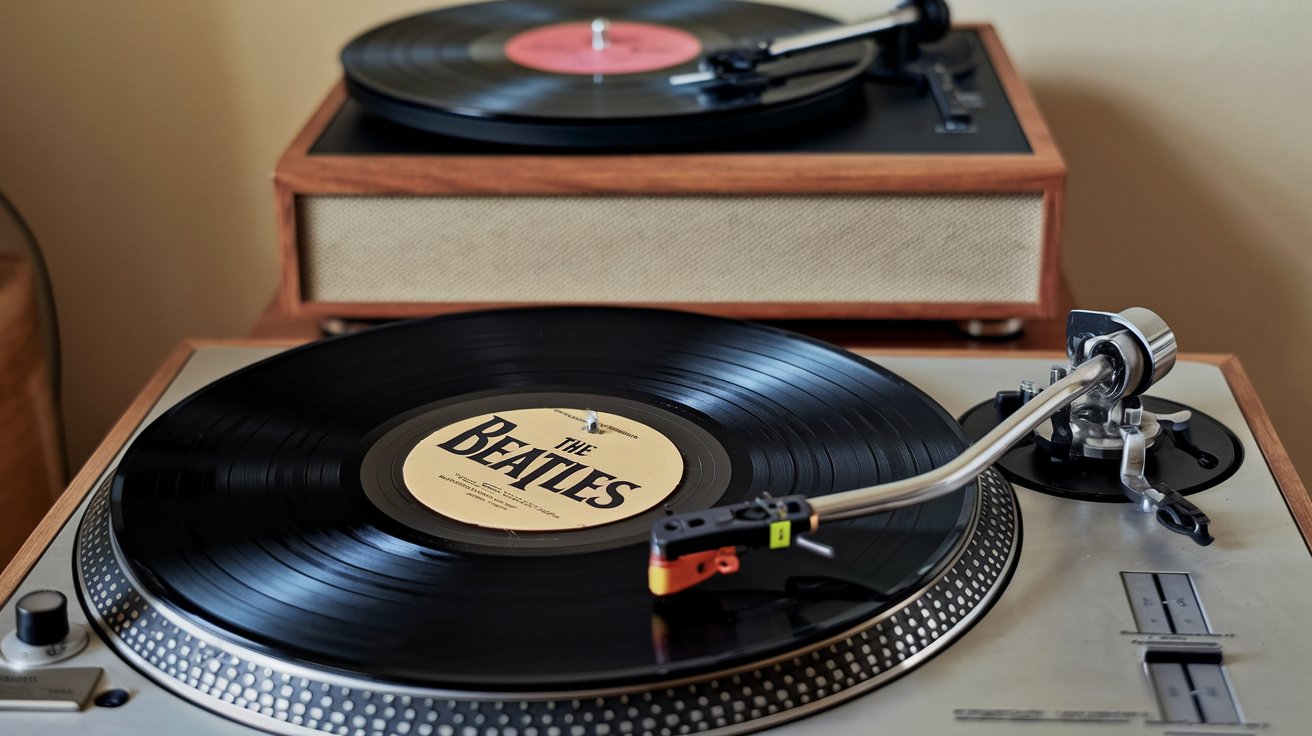
Replacing a record player needle, also called a stylus, is one of the most important maintenance tasks for vinyl enthusiasts. Whether you own an Audio Technica turntable, a Crosley, or a Victrola model, knowing how to properly replace your needle ensures optimal sound quality and protects your valuable vinyl collection from damage. This comprehensive guide walks you through the entire process, from identifying when replacement is needed to selecting the right stylus and installing it correctly on your specific turntable model.
How Does the Needle on a Record Player Work
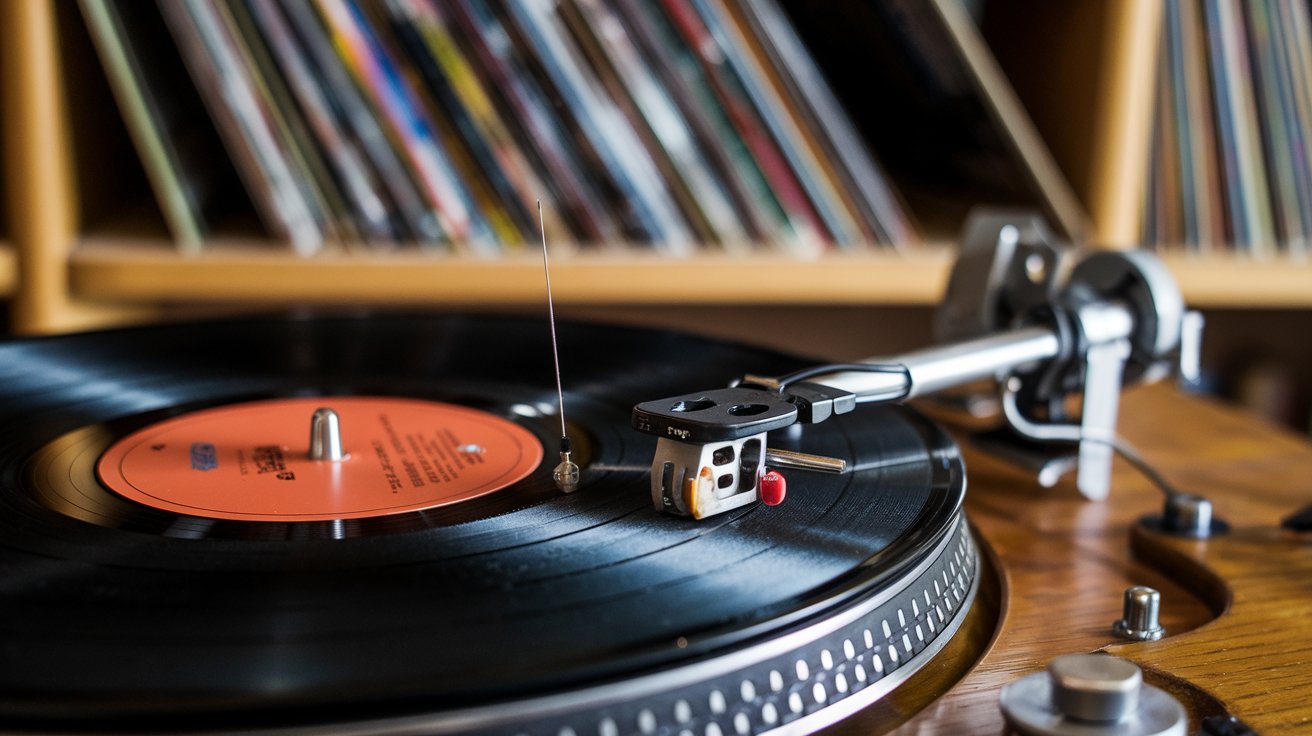
The record player needle, technically called a stylus, is a tiny precision component that rides within the grooves of your vinyl records. As the record spins, the stylus vibrates in response to the microscopic variations etched into the groove walls. These vibrations travel up through the cantilever (the small arm holding the needle) and into the cartridge, which converts these mechanical movements into electrical signals that your amplifier transforms into audible sound.
Modern stylus needles in 2026 are typically made from industrial diamond, bonded to a metal shank. Diamond remains the preferred material due to its exceptional hardness and durability, allowing it to withstand the friction of tracking thousands of records. The shape of the stylus tip—whether conical, elliptical, or advanced profiles like Shibata or microline—dramatically affects how accurately it traces the record groove and reproduces high-frequency information. Understanding this mechanism helps you appreciate why needle replacement is crucial for maintaining sound fidelity.
Can You Replace Just the Needle on a Record Player
Yes, you can absolutely replace just the needle on most modern record players without replacing the entire cartridge assembly. This is excellent news for budget-conscious vinyl collectors, as a replacement stylus typically costs between $15 and $150 depending on quality and brand, while a complete cartridge replacement can range from $50 to over $500. Most turntables manufactured after 2000, including popular brands like Audio Technica, Crosley, and Victrola, feature user-replaceable stylus designs specifically engineered for easy swapping.
However, some vintage record player needle replacement scenarios or very entry-level models may have the stylus permanently integrated into the cartridge. In these cases, you’ll need to replace the entire cartridge and stylus assembly together. Before purchasing a replacement, check your turntable’s manual or manufacturer website to confirm whether your model supports individual stylus replacement. The vast majority of turntables sold in the United States in 2026 feature removable, replaceable styli that snap or slide into place without requiring tools or technical expertise.
How to Tell When It’s Time to Replace the Needle
Recognizing when your record player needle needs replacement prevents damage to your vinyl collection and maintains optimal audio quality. Several clear indicators signal that it’s time for a new stylus, and understanding these warning signs helps you maintain your turntable properly.
It’s Worn Out Based on Usage Hours
The most reliable indicator for needle replacement is tracking hours. Industry standards recommend replacing your stylus after approximately 800 to 1,000 hours of playback for standard elliptical or conical styli. Advanced profile styli like Shibata or microline designs may last 1,200 to 2,000 hours due to their optimized contact geometry. If you listen to vinyl for two hours daily, you’ll reach this threshold in roughly 14 to 18 months. Keeping a simple log of your listening hours, either manually or through a smartphone app, ensures you replace your stylus needle before it damages your records. Many 2026 turntable models now include digital hour counters that automatically track playback time and alert you when replacement is recommended.
The Sound Quality is Poor or Distorted
Deteriorating audio quality is often the first noticeable sign that your record player needle requires replacement. Listen for increased sibilance (harsh ‘s’ and ‘t’ sounds), particularly noticeable on vocal recordings. Distortion during loud passages, especially in the inner grooves where tracking demands are highest, indicates stylus wear. You might also notice diminished high-frequency detail, making cymbals and acoustic guitars sound dull or muffled. If your records suddenly sound thin, lacking bass response, or if you hear crackling that persists even on freshly cleaned records, your stylus has likely worn down. A worn needle loses its ability to accurately trace the delicate groove modulations, resulting in information loss and increased surface noise that cleaning cannot remedy.
Your Records Show Groove Wear or Skipping Occurs
Physical damage to your vinyl collection represents the most serious consequence of delaying needle replacement. A worn stylus develops flat spots or irregular shapes that can actually carve into and permanently damage record grooves. If you notice your needle skipping across the record surface, especially on records that previously played perfectly, this indicates severe wear. Inspect your most-played records under bright light at an angle—if you see visible groove damage or whitish scuffing within the grooves, your stylus needle is beyond its service life and actively harming your collection. Additionally, if your tonearm skates across the record or has difficulty tracking dynamic passages, immediate replacement is necessary to prevent further damage to your irreplaceable vinyl.
You Bought a Secondhand Record Player
Purchasing a used record player always warrants immediate stylus inspection and likely replacement. You have no reliable way to know how many hours the previous owner accumulated or whether the needle was properly maintained. For $20 to $50, replacing the stylus on your new-to-you turntable represents inexpensive insurance against playing your records with a potentially damaged or excessively worn needle. This is particularly important for vintage record player needle replacement, where the stylus may be decades old and completely worn out despite appearing intact to the naked eye. Even if the seller claims the needle is recent, verification is impossible, making replacement the smart choice for protecting your vinyl investment.
How to Replace the Needle on a Record Player Step by Step
Replacing your record player needle is a straightforward process that typically takes just a few minutes once you have the correct replacement part. Follow these detailed steps to ensure proper installation and optimal performance from your new stylus.
Research and Order the Correct Replacement Stylus
Before attempting any physical work, identify the exact stylus needle replacement compatible with your turntable model. Check the manufacturer and model number printed on your turntable, typically found on the base plate or near the tonearm. For popular brands like Audio Technica, visit their official website and use their stylus finder tool by entering your cartridge or turntable model number. For Crosley and Victrola models, the manufacturer websites provide specific replacement part numbers for each model. Write down the complete model information before shopping. Generic needles marketed as ‘universal’ rarely perform as well as OEM (original equipment manufacturer) replacements and may damage your records. In 2026, most replacement styli are available through Amazon, Turntable Lab, LP Gear, and directly from manufacturer websites, with prices ranging from $15 for entry-level models to $200+ for audiophile-grade replacements.
Prepare Your Workspace and Turntable
Create a clean, well-lit workspace before beginning the replacement process. Turn off and unplug your record player to eliminate any risk of accidental power-on during the procedure. Remove any record from the platter and position the tonearm over its rest. Good lighting is essential—consider using a desk lamp or flashlight to clearly see the small components you’ll be working with. Wash your hands to remove oils that could transfer to the new stylus or record grooves. Have your replacement stylus package nearby but keep it sealed until you’re ready to install. If you wear reading glasses, put them on—the small size of stylus components makes clear vision crucial. Some people find taking a photo of the original stylus installation helpful as a reference for the new installation.
Remove the Old Stylus Assembly
Most modern record player needles use one of three removal methods. For slide-mount designs (common on Audio Technica and many Japanese turntables), gently pull the stylus assembly forward, away from the cartridge body, while holding the headshell steady. It should slide out with minimal resistance. For click-mount systems (typical on Crosley and Victrola models), grip the plastic stylus housing and pull straight down—you’ll feel a click as it releases. For screw-mount styles found on some vintage record player models, use a small screwdriver to loosen the retaining screw before removing. Never touch the actual needle tip or cantilever, as these delicate components bend easily. If the stylus seems stuck, apply very gentle rocking motions rather than forcing it. Consult your turntable’s manual if you encounter resistance—excessive force can damage the cartridge. Once removed, dispose of the old stylus needle carefully, as the tip remains sharp.
Install the New Replacement Stylus
Remove your new stylus from its protective packaging, handling only the plastic body—never touch the needle tip or cantilever wire. For slide-mount installations, align the stylus assembly with the cartridge’s front slot and gently slide it rearward until you feel it click into place. For click-mount designs, position the stylus below the cartridge body and press upward firmly but carefully until you hear and feel a distinct click indicating full engagement. For screw-mount types, position the stylus in the cartridge body, insert the retaining screw, and tighten just until snug—overtightening can crack the plastic housing. After installation, visually verify that the needle sits perpendicular to the record surface when the tonearm is in playing position. The cantilever should move freely without touching any part of the cartridge body. Before playing a valuable record, test the new stylus needle replacement on an inexpensive or heavily played record to confirm proper installation and sound quality.
How to Replace Needles on Specific Turntable Brands
Different record player manufacturers use varying stylus mounting systems, and understanding your specific brand’s approach simplifies the replacement process. Here’s detailed guidance for the most popular turntable brands in the United States market as of 2026.
How to Replace Needle on Audio Technica Record Players
Audio Technica turntables predominantly use a slide-mount stylus system across their popular AT-LP60X, AT-LP120XUSB, and AT-LP140XP models. To replace the stylus, grasp the sides of the black plastic stylus housing (not the cantilever or needle) and pull gently forward toward the front of the cartridge. The assembly slides out along a track. The replacement process involves aligning the new stylus assembly with the cartridge grooves and sliding it rearward until it clicks securely into position. Audio Technica uses model-specific replacement styli—for example, the AT-LP60X requires the ATN3600L stylus (around $19 in 2026), while the AT-LP120XUSB uses the ATN95E (approximately $49). The VM95 series, featured on newer models, offers a range of upgrade stylus options from the conical VM95C ($49) to the advanced Shibata VM95SH ($249), all using the same mounting system. Always verify your exact cartridge model before ordering, as Audio Technica styli are not universal across their product line.
How to Replace Needle on Crosley Record Players
Crosley record players typically employ a click-mount system that’s extremely user-friendly, designed for their target demographic of entry-level vinyl enthusiasts. Models like the Crosley Cruiser, Voyager, and Executive use the NP6 needle (red cartridge body) or NP1 needle (black cartridge body), both costing approximately $12-15 in 2026. To replace the stylus, firmly grasp the colored plastic cartridge body and pull straight down—you’ll feel it unclick from the tonearm mount. Installation reverses this process: align the new cartridge assembly with the metal tonearm bracket and push upward until you hear a definitive click. The entire Crosley needle replacement process takes under 30 seconds and requires no tools. Some higher-end Crosley models like the C6 and C10 use different cartridge systems with slide-mount styli, so always check your specific model documentation. Third-party upgrade options exist for Crosley turntables, but ensure compatibility before purchasing non-OEM needles, as tracking force and cartridge mounting differ from audiophile turntables.
How to Replace Needle on Victrola Record Players
Victrola record player models predominantly use a similar click-mount system to Crosley, as both brands target the portable and decorative turntable market. The Victrola suitcase-style players and many of their wooden cabinet models utilize a cartridge assembly that pulls straight down from the tonearm. Victrola’s replacement needle assemblies typically cost $10-20 and are model-specific—the VTA-65 cartridge fits several Navigator series models, while the VTA-72 serves the Revolution series. To replace the needle on Victrola turntables, grasp the cartridge body (usually white or red plastic), pull down firmly to disengage the clips, align the new assembly with the mounting bracket, and press upward until it clicks securely. Victrola has consolidated their stylus designs in recent years, making 2026 models more standardized than older units. Check the model number printed on your turntable’s base and cross-reference it on Victrola’s website to identify the correct replacement part, as using an incorrect cartridge can result in improper tracking force and potential record damage.
Vintage Record Player Needle Replacement Considerations
Vintage record player needle replacement presents unique challenges compared to modern turntables, as many classic models from the 1960s-1980s used proprietary cartridge and stylus designs no longer in production. For vintage players from brands like Pioneer, Technics, Dual, and Garrard, your first step is identifying the exact cartridge model, usually printed on the cartridge body itself. Websites like Thakker.eu, LP Gear, and TurntableNeedles.com maintain extensive databases of NOS (new old stock) and compatible aftermarket replacement needles for discontinued models. Some vintage cartridges used screw-mount styli requiring a small screwdriver for installation. Others employed unique clip or bayonet-style mounts specific to that manufacturer. When searching for vintage stylus replacements, you may find modern elliptical or conical styli that fit vintage cartridge bodies, often representing upgrades over the original equipment. If you cannot locate an exact replacement, consider replacing the entire cartridge with a modern equivalent like the Audio Technica VM95 series or Ortofon 2M Red, provided your tonearm has a standard half-inch mount. Vintage turntable restoration forums and communities can provide invaluable guidance for difficult-to-source replacements.
Are All Record Player Needles Universal
No, record player needles are not universal—this is one of the most important facts to understand before attempting replacement. Each turntable cartridge uses a specific stylus design engineered for that cartridge’s body, electrical characteristics, and mounting system. The stylus must match three critical parameters: physical mounting compatibility, correct tracking force specification, and appropriate electrical output for the cartridge type (moving magnet or moving coil).
While you might see generic needles marketed as ‘universal’ or ‘fits most turntables,’ these typically refer to common mounting systems rather than true universal compatibility. For example, many entry-level turntables from different manufacturers might use the same OEM cartridge from Chinese suppliers, making certain aftermarket styli broadly compatible across brands. However, using an incorrect stylus can result in improper tracking force, mistracking, accelerated record wear, or even cartridge damage. Always verify compatibility by cartridge model number rather than turntable brand alone. In 2026, the major stylus mounting standards include the Audio Technica slide-mount system, the Ortofon bayonet mount, the Shure side-screw system (legacy), and various proprietary designs from manufacturers like Nagaoka and Grado. The safest approach is always purchasing OEM replacement styli designed specifically for your cartridge model, ensuring perfect mechanical fit and optimal sonic performance.
Tips for Extending Your Record Player Needle Lifespan
Maximizing the service life of your record player needle saves money and maintains consistent sound quality between replacements. Several best practices significantly extend stylus longevity while protecting your vinyl collection.
First, always clean your records before playing. Dust and debris in record grooves act like sandpaper against the stylus tip, accelerating wear dramatically. Use a carbon fiber brush before each play and periodically deep-clean records with a proper record cleaning solution. Second, clean the stylus itself regularly using a dedicated stylus cleaning brush, brushing gently from back to front (never side to side). Monthly cleaning with a stylus cleaning solution removes accumulated gunk that increases friction and wear. Third, ensure your tonearm tracking force is properly calibrated to the manufacturer’s specifications—both excessive and insufficient force accelerate needle wear and can damage records. Use a digital tracking force gauge for accuracy. Fourth, always lower and raise the tonearm using the cueing lever rather than dropping or lifting it manually, which can bend the delicate cantilever. Finally, when not in use, ensure the tonearm rests securely in its holder with the protective cap covering the stylus needle. Following these maintenance practices can extend stylus life by 30-50% beyond standard expectations, potentially reaching 1,200-1,500 hours for quality styli in 2026.
Understanding Stylus Types and Upgrade Options
The stylus needle market offers various tip profiles and construction grades, and understanding these differences helps you make informed decisions about replacements and potential upgrades. The shape and quality of your stylus profoundly impacts sound reproduction and record preservation.
Conical (spherical) styli represent the most basic design, featuring a rounded tip that contacts record grooves at a relatively small point. These needles are durable and inexpensive ($15-30) but retrieve less information from the groove, particularly high frequencies. Elliptical styli feature an elongated profile that increases groove contact area, improving high-frequency response and stereo separation compared to conical designs while costing $30-80. Advanced profiles like Shibata, microline, and line-contact styli ($100-300+) offer even greater contact area with the groove walls, retrieving maximum information and reducing record wear by distributing pressure across a larger surface. These premium stylus designs also track inner grooves more accurately, where distortion typically increases. The diamond tip quality also varies—bonded diamonds (where a diamond chip is attached to a metal shank) are standard on most needles, while nude diamonds (where the entire stylus is shaped from a single diamond) offer superior performance but command premium prices. For 2026, many manufacturers offer upgrade paths allowing you to maintain your existing cartridge while installing a higher-grade stylus replacement, providing improved sound quality without complete cartridge replacement costs.
Common Mistakes to Avoid When Replacing Your Needle
Several common errors during needle replacement can damage your turntable, ruin your new stylus, or harm your records. Understanding these pitfalls ensures successful replacement every time.
The most frequent mistake is touching the actual needle tip or cantilever during handling. These components are extraordinarily delicate—the cantilever wire is typically 0.3mm in diameter and bends permanently with minimal pressure. Always handle the stylus by its plastic body only. Second, forcing a stylus into an incorrect cartridge damages both components. If installation requires significant force, stop and verify you have the correct replacement part. Third, failing to verify proper installation before playing valuable records risks cartridge damage and record destruction. Always test on an expendable record first. Fourth, many people neglect to readjust tracking force after stylus replacement, even though different stylus profiles may have different optimal tracking specifications. Check your new stylus documentation and recalibrate if necessary. Fifth, purchasing cheap ‘universal’ needles from unknown suppliers often results in poor-quality diamonds that wear quickly and damage records. Stick with OEM parts or reputable aftermarket manufacturers like Jico, LP Gear, and Ortofon. Finally, some users fail to remove protective guards from new styli before installation—that small plastic clip protecting the needle during shipping must be removed, or your turntable won’t produce sound. Taking your time and following manufacturer instructions prevents these easily avoidable mistakes.
Related video about how to replace needle on record player
This video complements the article information with a practical visual demonstration.
Your questions answered
Can you replace just the needle on a record player?
Yes, you can replace just the needle (stylus) on most modern record players without replacing the entire cartridge. Turntables from Audio Technica, Crosley, Victrola, and most other brands manufactured after 2000 feature user-replaceable stylus designs that snap, slide, or click into place. Replacement styli cost between $15-150 depending on quality, while complete cartridge replacements range from $50-500+. However, some vintage models and very basic turntables have permanently integrated styli requiring full cartridge replacement. Check your turntable manual or manufacturer website to confirm whether your specific model supports individual stylus replacement before purchasing parts.
Is it easy to replace a stylus on a record player?
Yes, replacing a stylus is generally very easy and takes just a few minutes for most turntable models. Modern turntables use three main mounting systems: slide-mount (pull forward, slide new one back), click-mount (pull down, push new one up until it clicks), or screw-mount (requires a small screwdriver). The process requires no technical expertise or special tools for most models. The key is ordering the correct replacement stylus for your specific cartridge model and handling the new stylus carefully by its plastic body only—never touching the delicate needle tip or cantilever. With proper lighting and gentle handling, most vinyl enthusiasts successfully complete their first stylus replacement without assistance.
Are all record player needles universal?
No, record player needles are not universal. Each turntable cartridge requires a specific stylus designed for that cartridge’s mounting system, tracking characteristics, and electrical specifications. While some aftermarket needles may fit multiple cartridge models from the same manufacturer, using an incompatible stylus can result in mistracking, poor sound quality, accelerated record wear, or cartridge damage. Always identify your exact cartridge model number and purchase OEM (original equipment manufacturer) replacement styli or verified compatible aftermarket options from reputable suppliers. Generic ‘universal’ needles advertised to fit any turntable rarely deliver optimal performance and may damage your vinyl collection through improper tracking force or tip geometry.
How do you put a needle on a vinyl player?
To install a needle on a vinyl player, first identify your cartridge mounting type (slide, click, or screw mount). For slide-mount systems, align the new stylus assembly with the cartridge’s front grooves and gently slide it backward until it clicks into place. For click-mount designs, position the stylus below the cartridge and press upward firmly until you hear and feel a click. For screw-mount types, position the stylus in the cartridge body, insert the retaining screw, and tighten until snug without overtightening. Always handle the stylus by its plastic body, never touching the needle tip or cantilever wire, which are extremely delicate. After installation, visually verify the needle sits perpendicular to the record surface when the tonearm is in playing position.
How often should I replace my record player needle?
Replace your record player needle after approximately 800-1,000 hours of playback for standard elliptical or conical styli. Advanced profile styli like Shibata or microline designs may last 1,200-2,000 hours due to optimized contact geometry. If you listen to vinyl for two hours daily, expect to replace your stylus every 14-18 months. Beyond hour count, replace your needle if you notice deteriorating sound quality, increased sibilance or distortion, skipping on previously playable records, or if you purchased a used turntable with unknown stylus history. Many 2026 turntable models include digital hour counters that automatically track playback time and alert you when replacement is recommended, eliminating the need for manual tracking.
What’s the difference between a cheap and expensive replacement needle?
Expensive replacement needles ($100-300+) typically feature advanced tip profiles like Shibata, microline, or line-contact designs that make greater contact with record grooves, retrieving more musical information and reducing record wear. They use nude diamond construction (single shaped diamond) rather than bonded diamonds (diamond chip attached to metal shank), offering superior rigidity and frequency response. Premium styli also feature higher-quality cantilever materials like boron or sapphire instead of aluminum. Cheap needles ($15-30) usually have conical or basic elliptical profiles with bonded diamonds and aluminum cantilevers, providing adequate but not exceptional performance. For casual listeners, mid-priced OEM replacement styli ($30-80) offer the best value, while serious audiophiles benefit from premium upgrades that reveal subtle details and textures in their favorite recordings.
| Replacement Aspect | Key Details | Primary Benefit |
|---|---|---|
| Replacement Frequency | Every 800-1,000 hours (standard styli) or 1,200-2,000 hours (advanced profiles) | Maintains optimal sound quality and prevents record damage |
| Cost Range | $15-30 (entry-level), $30-80 (mid-grade), $100-300+ (audiophile) | More affordable than complete cartridge replacement ($50-500+) |
| Installation Time | 2-5 minutes for most modern turntables with standard mounting systems | Quick DIY maintenance without professional assistance needed |
| Brand Compatibility | Model-specific for Audio Technica, Crosley, Victrola, and most manufacturers | Ensures proper tracking force and cartridge electrical matching |
| Mounting Systems | Slide-mount, click-mount, or screw-mount depending on cartridge design | Tool-free installation for most modern turntable models |
| Upgrade Potential | Many cartridges accept multiple stylus grades (conical to Shibata profiles) | Improved sound quality without replacing entire cartridge assembly |