Determining how old your computer is matters whether you’re troubleshooting performance issues, planning upgrades, or selling your device. The age of your PC affects warranty coverage, compatibility with modern software, and resale value. This comprehensive guide reveals seven proven methods to check your computer’s age accurately, covering Windows 10, Windows 11, Mac systems, and major brands like HP, Dell, and Lenovo with 2026-updated techniques.
Why Knowing Your Computer’s Age Matters in 2026
Understanding how old your computer is provides critical insights for several important reasons. First, manufacturers typically offer warranty coverage between one to three years, and knowing your PC’s exact age helps you determine if you still have protection for hardware failures. Second, software compatibility increasingly depends on hardware age, with Windows 11 requiring specific processors from 2017 or newer. Third, computer age affects resale value significantly, with devices losing approximately 30-40% of their value in the first two years according to 2026 market data from the United States.
Performance degradation correlates directly with system age due to thermal paste deterioration, dust accumulation, and mechanical wear on moving parts like fans and hard drives. Security concerns also escalate with older systems, as manufacturers discontinue security updates for devices beyond five to seven years old. Finally, upgrade decisions become clearer when you know your computer’s age; investing $500 in upgrades for a seven-year-old laptop rarely makes financial sense compared to purchasing a new system with modern architecture and efficiency improvements.
Method 1: Check BIOS Date to Find Your Computer’s Manufacturing Year
The BIOS date represents one of the most reliable indicators of your computer’s age because it reflects when the motherboard firmware was installed during manufacturing. This method works universally across Windows 10, Windows 11, and older operating systems. The BIOS (Basic Input/Output System) or its modern replacement UEFI (Unified Extensible Firmware Interface) contains a timestamp that rarely changes unless you manually update the firmware, making it an excellent reference point for determining computer age.
To access your BIOS date on Windows, restart your computer and press the designated key during startup, typically F2, F10, F12, Del, or Esc depending on your manufacturer. HP computers usually use F10 or Esc, Dell systems commonly use F2 or F12, and Lenovo devices often require F1 or F2. Once inside the BIOS interface, navigate to the System Information or Main tab where you’ll find the BIOS Version and BIOS Date listed prominently. The date format typically appears as MM/DD/YYYY in United States systems, showing the exact month and year your motherboard was manufactured.
Windows Command Prompt Method for BIOS Date
You can check your BIOS date without restarting using Windows Command Prompt or PowerShell. Press Windows Key + X and select Command Prompt or Terminal from the menu. Type the command systeminfo | find /i “BIOS” and press Enter to display your BIOS version and date instantly. Alternatively, use the command wmic bios get releasedate which returns the date in YYYYMMDD format. This method works identically on both Windows 10 and Windows 11 systems and provides immediate results without interrupting your workflow.
For Mac users, the equivalent information appears in the System Report accessible through the Apple menu. Click the Apple logo, select About This Mac, then System Report. Under Hardware, you’ll find the Model Identifier and Boot ROM Version, which contain date codes indicating manufacturing periods. Mac serial numbers also encode production dates, with specific character positions revealing the manufacturing year and week within Apple’s coding system used consistently since 2010.
Understanding BIOS Date Limitations
While BIOS dates provide reliable age estimates, understand that this date reflects motherboard manufacturing rather than final assembly. Manufacturers often use motherboards produced weeks or months before the computer’s assembly date, so your BIOS date might predate your actual purchase by one to three months. Additionally, if previous owners updated the BIOS firmware, the displayed date reflects the update rather than original manufacturing. Check for multiple date references within BIOS settings, as some systems display both original and updated firmware dates separately.
Method 2: Decode Your Serial Number to Determine Computer Age
Every computer manufacturer assigns a unique serial number containing encoded information about production date, factory location, and model specifications. This alphanumeric code serves as the most definitive method to find out how old your laptop or desktop is because manufacturers maintain comprehensive databases linking serial numbers to specific production dates. The serial number typically appears on a sticker affixed to your computer’s bottom panel, inside the battery compartment for laptops, or on the rear panel for desktops.
For HP computers, locate the serial number on the bottom of the device or inside the battery bay, then visit HP’s official support website and enter the serial number in their warranty check tool. The system automatically displays your computer’s exact ship date and original warranty period. HP serial numbers follow specific formats, with characters 4-5 typically indicating the year and week of manufacture. Similarly, Dell computer serial numbers contain seven characters, with specific positions encoding manufacturing dates that Dell’s online support tool decodes automatically when you enter your service tag.
Brand-Specific Serial Number Lookup Methods
Lenovo computers use serial numbers typically starting with letters followed by numbers, found on the bottom panel or accessed through BIOS settings. Enter your serial number on Lenovo’s support website under the warranty lookup section to receive detailed information including manufacture date, original specifications, and warranty status. ASUS, Acer, and MSI systems provide similar online lookup tools accessible through their respective support websites, requiring only the serial number to retrieve complete manufacturing information including the exact production date.
To find your serial number without physical inspection, open Command Prompt in Windows and type wmic bios get serialnumber to display the serial number immediately. On Windows 11 and Windows 10, you can also access this through Settings > System > About, where the Device specifications section lists your serial number under Device ID. Mac users find serial numbers in System Report or simply by clicking About This Mac, with the serial number displayed prominently beneath the macOS version information.
Interpreting Serial Number Date Codes
Different manufacturers encode dates within serial numbers using proprietary systems. HP serial numbers use characters 4-5 to represent the year, where 15 indicates 2015, 20 indicates 2020, and so forth through 2026. Characters 6-7 represent the week number within that year, ranging from 01 to 52. Dell service tags don’t directly encode dates but link to Dell’s database where manufacture dates are stored. Understanding these encoding systems helps you quickly estimate age even without internet access to manufacturer lookup tools, though online verification always provides the most accurate results for warranty and specification details.
Method 3: Check Windows Installation Date
The Windows installation date reveals when your operating system was first installed, which often corresponds closely to your computer’s purchase date for new systems with pre-installed Windows. While this method doesn’t indicate hardware manufacturing date, it provides a reliable reference point for when you or the original owner began using the computer. For machines purchased new with Windows 10 or Windows 11 pre-installed, the installation date typically falls within days or weeks of manufacturing.
To check your Windows installation date, open Command Prompt as administrator and type systeminfo | find /i “Original Install Date” then press Enter. The system displays the exact date and time Windows was first installed on your hard drive. Alternatively, use PowerShell with the command [WMI]”|Get-CimInstance Win32_OperatingSystem|Select-Object InstallDate for detailed timestamp information. This method works reliably on all Windows versions from Windows 7 through Windows 11 available in 2026.
Windows Installation Date Limitations
Important caveats exist when using Windows installation dates to determine computer age. If previous owners reinstalled Windows, performed clean installations, or upgraded from older Windows versions, the displayed date reflects that action rather than original purchase date. Additionally, computers sold through refurbishment programs or retail stores might have installation dates significantly newer than manufacturing dates due to testing, configuration, or display usage. Cross-reference this date with other methods like BIOS date and serial number lookup for accurate age determination, especially when purchasing used computers in the United States secondary market.
Method 4: Examine Hard Drive or SSD Power-On Hours
Your storage drive maintains detailed operational statistics including power-on hours, which indicate total operational time since manufacturing. This metric provides insights into actual usage rather than chronological age, helping distinguish between a three-year-old computer used daily versus one sitting idle. Modern SSDs and traditional hard drives record this information in SMART (Self-Monitoring, Analysis, and Reporting Technology) data accessible through specialized software utilities available free in 2026.
Download and install CrystalDiskInfo, a free utility widely trusted across the United States for drive health monitoring. After installation, launch the program to view comprehensive drive statistics including Power On Hours and Power On Count. For a typical computer used eight hours daily, expect approximately 2,920 power-on hours per year. A drive showing 15,000 power-on hours suggests roughly five years of standard daily use, though intensive users might accumulate this in three years while casual users might take seven years.
Interpreting Power-On Hours Accurately
Power-on hours reveal usage intensity rather than calendar age, making them valuable for assessing used computer condition. A 2021 laptop with 8,000 power-on hours experienced heavier use than a 2019 laptop with 3,000 hours, affecting component wear, thermal paste degradation, and battery cycle counts. Compare power-on hours against other age indicators to develop a complete picture. Business computers often accumulate hours rapidly due to continuous operation, while home computers typically show lower totals reflecting evening and weekend usage patterns common in United States households.
Method 5: Review System Information and Specifications
The System Information utility in Windows provides comprehensive details about your computer’s hardware, including component dates and model numbers that help determine age. Press Windows Key + R, type msinfo32, and press Enter to open the System Information window. The System Summary section displays your System Manufacturer, System Model, BIOS Version/Date, and original equipment specifications that correspond to specific manufacturing periods and technology generations.
Examine the processor model listed under Processor to identify your computer’s age range. Intel processors follow generational naming conventions, with 11th generation (like Core i7-1165G7) released in 2021, 12th generation in 2022, 13th generation in 2023, and 14th generation in 2024-2025. AMD Ryzen processors similarly indicate age through series numbers, with Ryzen 5000 series from 2020-2021, Ryzen 6000 series from 2022, and Ryzen 7000 series from 2022-2023. By 2026, 15th generation Intel and Ryzen 8000 series processors dominate new systems in the United States market.
Using Component Specifications to Date Your Computer
Graphics cards, RAM types, and storage interfaces reveal additional age clues. DDR4 RAM dominated systems from 2015 through 2022, while DDR5 RAM became standard in mid-range and premium systems starting 2022-2023. If your System Information shows DDR5 memory, your computer likely dates from 2022 or newer. Similarly, PCIe 3.0 SSDs indicate systems from 2015-2021, PCIe 4.0 suggests 2020-2023 timeframes, and PCIe 5.0 storage confirms 2023 or newer manufacturing dates. Cross-reference these component generations with your processor model for accurate age estimation within six-month windows.
Method 6: Check Purchase Documentation and Receipts
Original purchase receipts, invoices, or order confirmations provide definitive proof of your computer’s age, establishing the exact date you or previous owners acquired the device. Search email accounts for order confirmations from retailers like Amazon, Best Buy, Newegg, or manufacturer direct purchases from Dell, HP, or Lenovo. These documents typically include purchase date, model number, specifications, and warranty start dates that conclusively establish your computer’s age for warranty claims, insurance purposes, or resale valuation.
For computers purchased through retailers, contact their customer service departments with your name, approximate purchase date, and payment method to retrieve historical order information. Major United States retailers maintain purchase records for seven to ten years, allowing recovery of documentation even for older systems. If you purchased through financing programs or business accounts, check those service portals for historical transaction records that include detailed computer specifications and purchase dates.
Method 7: Physical Inspection of Components and Labels
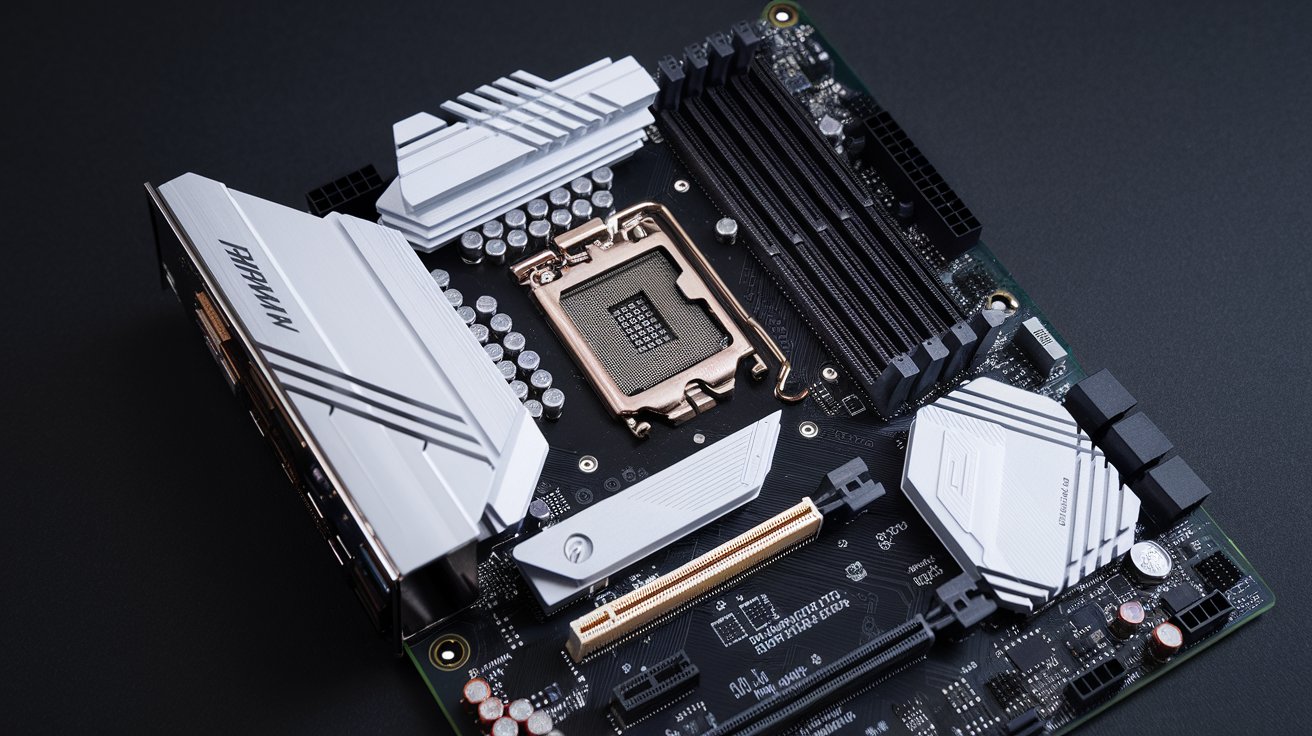
Conducting a physical inspection of your computer’s internal components reveals manufacturing dates printed directly on hardware parts. If comfortable opening your computer case (ensuring warranty isn’t voided), examine the motherboard, RAM modules, power supply, and other components for date stamps. Manufacturers print production dates on component labels using formats like 2023-W15 (indicating week 15 of 2023) or simpler MM/YYYY stamps providing month and year information.
The motherboard typically displays the most useful date information, printed near the RAM slots, expansion card slots, or along the board edges. Look for four-digit year codes (2020, 2021, etc.) or week/year combinations that indicate manufacturing periods. RAM modules show dates on the label stickers adhered to each memory stick, while the power supply contains manufacturing dates on its main label visible without disassembly in many desktop systems. These dates represent component manufacturing rather than final assembly but typically fall within three to six months of your computer’s completion date.
Safety Considerations for Physical Inspection
Before attempting physical inspection, power down your computer completely, unplug all cables, and if working with a laptop, remove the battery if possible. Opening computer cases may void manufacturer warranties on newer systems, so check warranty status before proceeding. Desktop computers generally allow easier inspection than laptops, with side panels secured by screws or tool-less latches. For laptops, bottom panel removal typically requires small Phillips-head screwdrivers and careful attention to hidden clips. If uncomfortable with hardware inspection, the previously described software methods provide sufficient age determination without physical access risks.
How to Check Computer Age on Mac Systems
Apple Mac computers require different techniques to determine age accurately. Click the Apple menu in the top-left corner and select About This Mac to display your Mac’s model name, year, processor, memory, and serial number. The year indicator directly states manufacturing year for models released as distinct annual versions, such as MacBook Air (M2, 2022) or iMac (24-inch, M1, 2021). This straightforward labeling makes Mac age identification simpler than many Windows systems.
For more detailed information, use the Mac serial number decoder available on Apple’s official support website or third-party tools like Chipmunk.nl or Ultimate Mac. These services decode the 10-12 character serial number to reveal exact manufacturing week, factory location, and configuration details. Mac serial numbers from 2010 onward follow a consistent format where specific character positions encode the production year and week. Characters 4-5 in older formats or specific letters in newer formats indicate manufacturing year, while subsequent characters pinpoint the week and factory location.
Using macOS System Report for Hardware Details
Access the detailed System Report by clicking About This Mac, then System Report button. The Hardware Overview section displays Model Identifier, Boot ROM Version, and Serial Number with additional technical specifications. The Model Identifier (like MacBookPro18,3) corresponds to specific release dates documented in Apple’s technical specifications database. Cross-reference your Model Identifier with Apple’s official specifications page or MacTracker database to determine your Mac’s exact release date, original configurations, and discontinuation date for comprehensive age verification.
Brand-Specific Methods for Popular Manufacturers
Major computer manufacturers provide dedicated tools for determining computer age specific to their systems. HP computers benefit from HP Support Assistant software pre-installed on most systems, accessible through the Start menu. This utility displays warranty information, system specifications, and purchase date when connected to HP’s online services. Alternatively, visit HP’s official support website and enter your product serial number or product number in the warranty check tool for immediate age verification including exact ship date from HP’s factories.
Dell systems utilize Service Tags instead of traditional serial numbers, typically seven characters printed on stickers affixed to the computer chassis. Visit Dell’s support website, enter your Service Tag, and receive comprehensive information including ship date, original configuration, warranty status, and support documentation. Dell’s system proves particularly reliable because the Service Tag database maintains complete historical records since the 1990s, ensuring accurate age determination even for older systems still operational in 2026.
Lenovo and Other Major Manufacturers
Lenovo computers use serial numbers accessible through BIOS, Windows System Information, or stickers on the device bottom. The Lenovo Vantage application, available free through the Microsoft Store, provides system information including warranty status that reveals purchase date. For Lenovo ThinkPad, IdeaPad, and Legion series, visit Lenovo’s support website and use the warranty lookup tool with your serial number to retrieve manufacture date and specification details maintained in Lenovo’s comprehensive database.
ASUS, Acer, MSI, and other manufacturers offer similar online lookup services through their respective support websites. These services typically require serial numbers found on device labels or accessible through Windows System Information. Most manufacturers maintain warranty databases that link serial numbers to production dates, original configurations, and regional distribution information useful for accurate age determination and specification verification when considering upgrades or resale in the United States market.
What to Do After Determining Your Computer’s Age
Once you’ve established how old your computer is, use this information strategically for maintenance, upgrade decisions, and planning. Computers aged three years or newer typically benefit from targeted upgrades like additional RAM, SSD replacements, or graphics card improvements, with costs justified by extended useful life. Systems between four to six years old require careful cost-benefit analysis, comparing upgrade expenses against current system capabilities and new computer prices that have become increasingly competitive in 2026’s United States market.
For computers older than six years, consider replacement rather than substantial upgrades due to architecture limitations, end-of-life software support, and incompatibility with modern standards like Wi-Fi 6E, USB 4.0, and PCIe 5.0. However, older systems remain valuable for specific tasks like dedicated media centers, secondary home computers, or repurposed servers. Document your computer’s age and specifications for insurance purposes, tax depreciation if used for business, and accurate pricing when selling through marketplaces like eBay, Facebook Marketplace, or specialized electronics resellers operating throughout the United States.
Related video about how old is my computer
This video complements the article information with a practical visual demonstration.
Your questions answered
How do I find out how old my computer is without turning it on?
Check the serial number located on a sticker on your computer’s bottom panel, rear case, or inside the battery compartment for laptops. Enter this serial number on your manufacturer’s support website (HP, Dell, Lenovo, etc.) to retrieve the exact manufacturing or ship date without powering on the device. The serial number sticker also typically includes the model number, which you can research to determine the product release date and manufacturing period. Physical date stamps on external labels sometimes indicate manufacturing month and year directly.
Is the BIOS date the same as when my computer was built?
The BIOS date reflects when the motherboard firmware was created, typically within one to three months before your computer’s final assembly and sale. Manufacturers often use motherboards produced weeks earlier, so the BIOS date usually predates your actual purchase by a short period. Additionally, if the BIOS was updated after purchase, the displayed date reflects that update rather than original manufacturing. For most accurate results, cross-reference BIOS date with serial number lookup and Windows installation date to establish a reliable age range.
How can I tell if my Windows 11 computer is new or refurbished?
Check the Windows installation date using Command Prompt with the command ‘systeminfo | find /i “Original Install Date”‘ to see when Windows was installed. New computers typically show installation dates within days of purchase, while refurbished systems often have recent installation dates despite older hardware. Examine the serial number through manufacturer warranty lookup tools, which indicate original ship date and whether the warranty is original or renewed. Physical inspection for wear on keys, trackpad, ports, and cosmetic condition also reveals refurbishment status. Review your purchase documentation to confirm whether the seller explicitly listed the computer as new or refurbished.
What’s the average lifespan of a computer in 2026?
The average computer lifespan in 2026 ranges from five to eight years depending on usage intensity, build quality, and maintenance. Premium business-grade laptops like Lenovo ThinkPads or Dell Latitudes typically last seven to ten years with proper care, while budget consumer models average four to six years. Desktop computers generally outlast laptops due to better cooling and upgradability, often remaining functional for eight to twelve years with component upgrades. Factors affecting lifespan include thermal management, storage type (SSDs last longer than mechanical hard drives), build quality, and whether the system receives regular maintenance like dust cleaning and thermal paste replacement every two to three years.
Can I determine my HP laptop age from the model number alone?
HP model numbers provide clues about release year but don’t precisely indicate your specific laptop’s manufacturing date. HP uses alphanumeric model numbers like 15-dy2095wm where the generation codes sometimes correlate with release years, but individual units from the same model ship over 12-24 month periods. For precise age determination, use your HP serial number with HP’s warranty lookup tool on their official support website, which provides the exact ship date from HP’s factories. The serial number characters 4-5 encode the year, and characters 6-7 represent the manufacturing week, offering immediate age estimation without online tools.
How old is too old for a computer to upgrade versus replace?
Generally, computers older than six years face diminishing returns on upgrades due to architectural limitations, platform obsolescence, and compatibility issues with current software requiring modern instruction sets and security features. Systems aged three to five years benefit most from targeted upgrades like RAM expansion from 8GB to 16GB, SSD replacements, or graphics card improvements, typically costing $200-$500 while extending useful life two to three years. For computers older than seven years, replacement usually proves more cost-effective unless performing basic tasks like word processing or web browsing. Consider that 2026 systems offer substantial efficiency improvements in performance-per-watt, security features like TPM 2.0, and modern connectivity standards that older platforms cannot match regardless of component upgrades.
| Method | Accuracy Level | Best For |
|---|---|---|
| BIOS Date Check | High (±1-3 months) | Quick verification without internet access |
| Serial Number Lookup | Very High (exact date) | Definitive age with manufacturer warranty info |
| Windows Install Date | Medium (if not reinstalled) | Systems with original OS installation |
| Power-On Hours | Medium (usage vs age) | Assessing actual wear and usage intensity |
| Component Inspection | High (±2-6 months) | Hardware-savvy users with case access |
| Purchase Documentation | Perfect (exact date) | Warranty claims and official verification |